Create your first CRUD
Make sure you followed the Getting Started before starting this tutorial.
Let's dive into creating a full new entity with database, backend and ui.
We will create a "Project" entity with the full CRUD (Create Read Update Delete) screens.
Step 1: Create the Project database schema
Update the Prisma Database Schema
We will use Prisma (opens in a new tab) to add the project entity to our database schema.
Because we are creating a new entity, we need to create a new file to store all details related to the new Project
model.
Create a prisma/schema/project.prisma
file and add a new model called Project
with the following fields.
model Project {
id String @id @default(cuid())
createdAt DateTime @default(now())
updatedAt DateTime @updatedAt
name String @unique
description String?
}
Cut the running pnpm dev
if needed, and then run the pnpm db:push
command to update your database.
You can run pnpm dev
again.
Create you first project
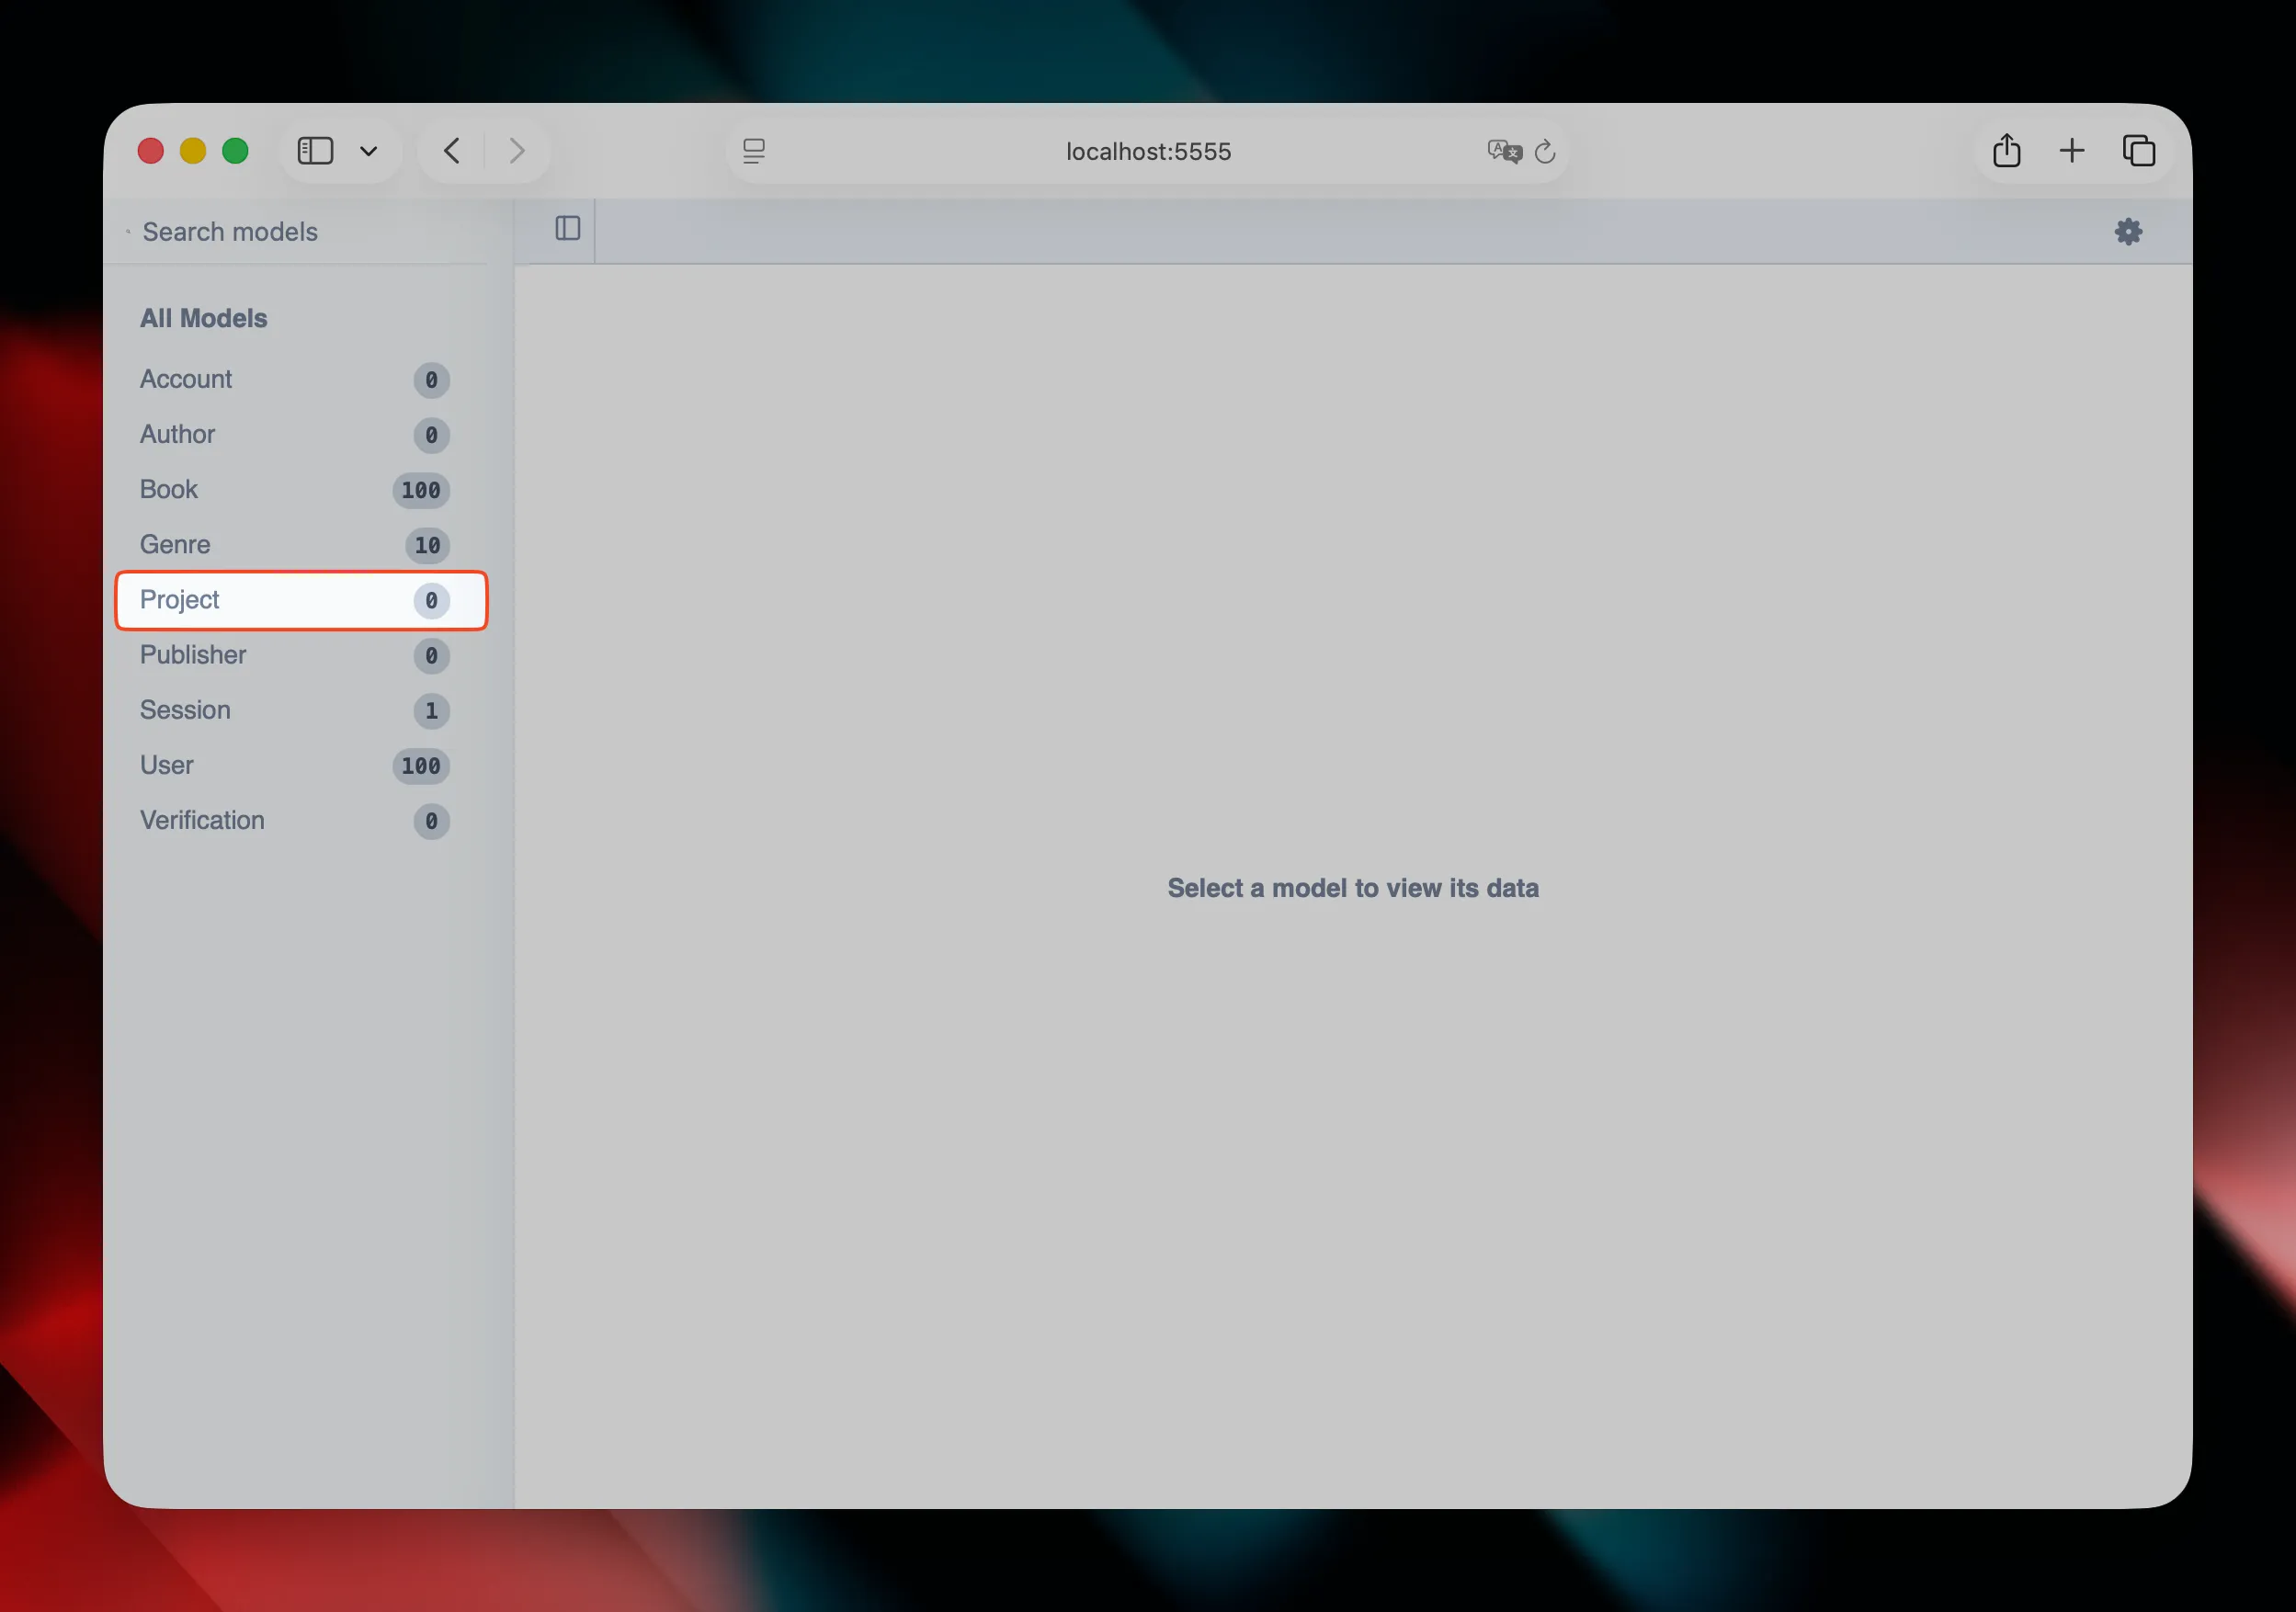
We can see what is inside of our database with the pnpm db:ui
command.
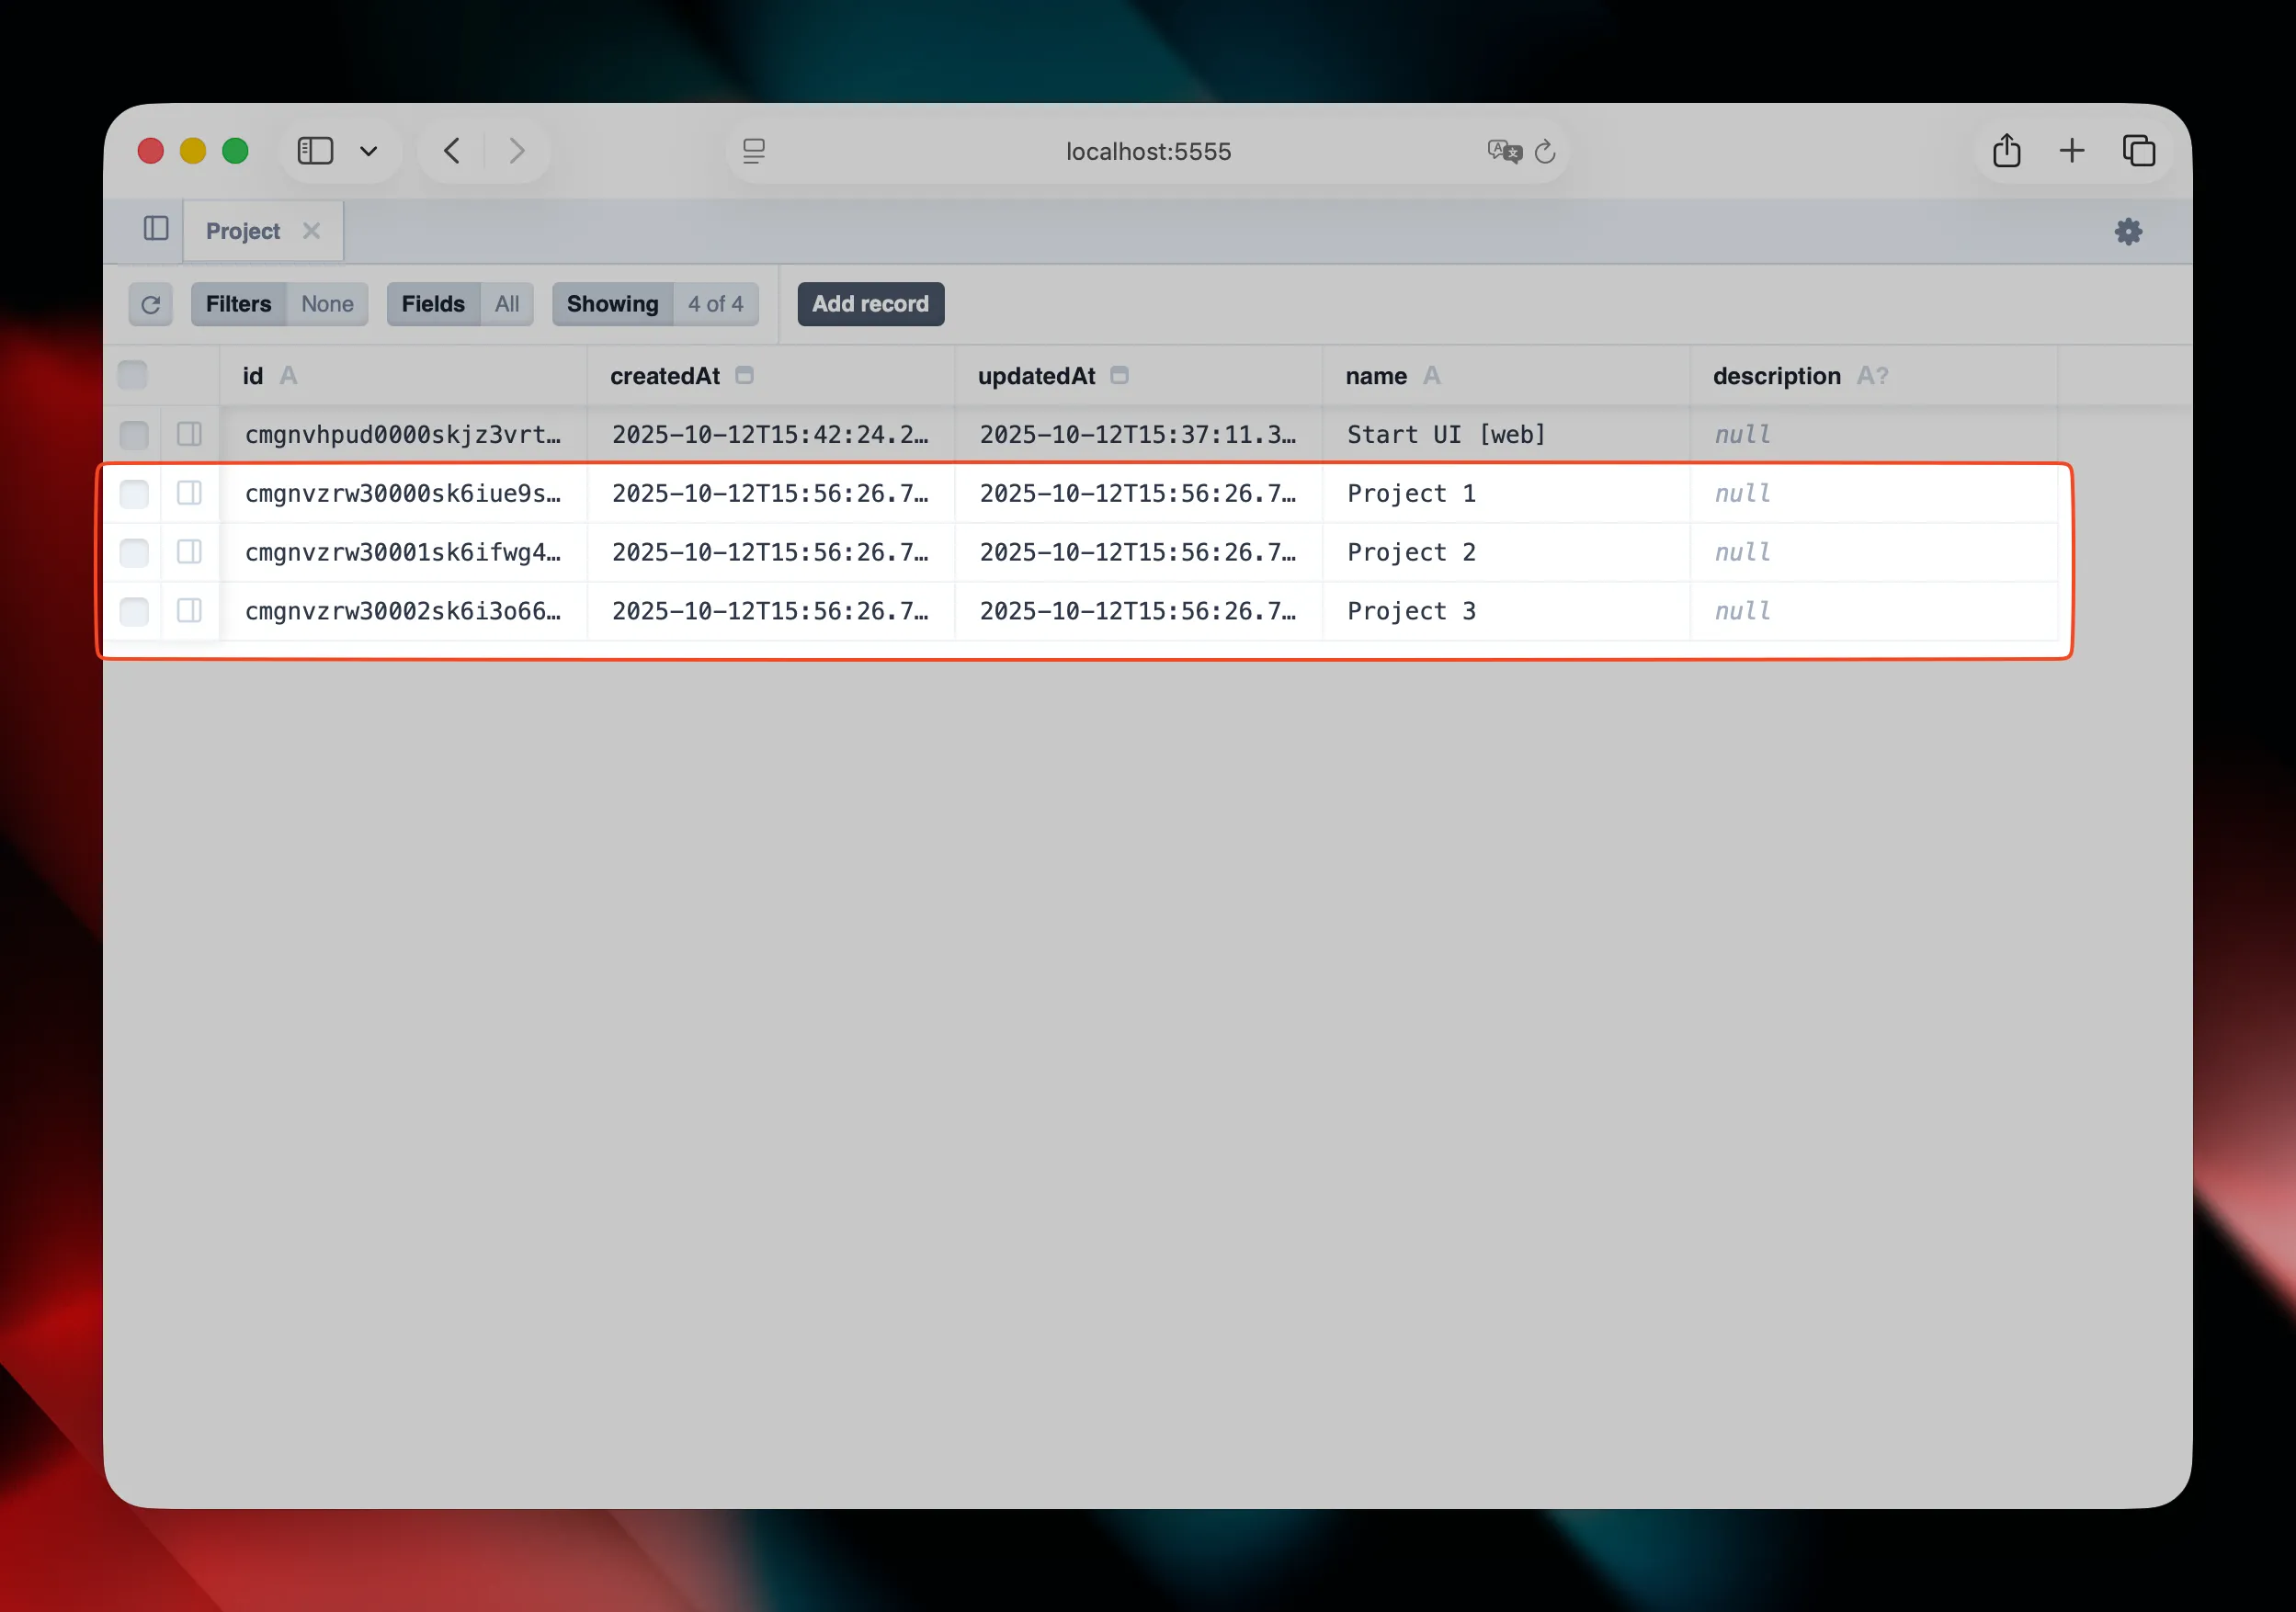
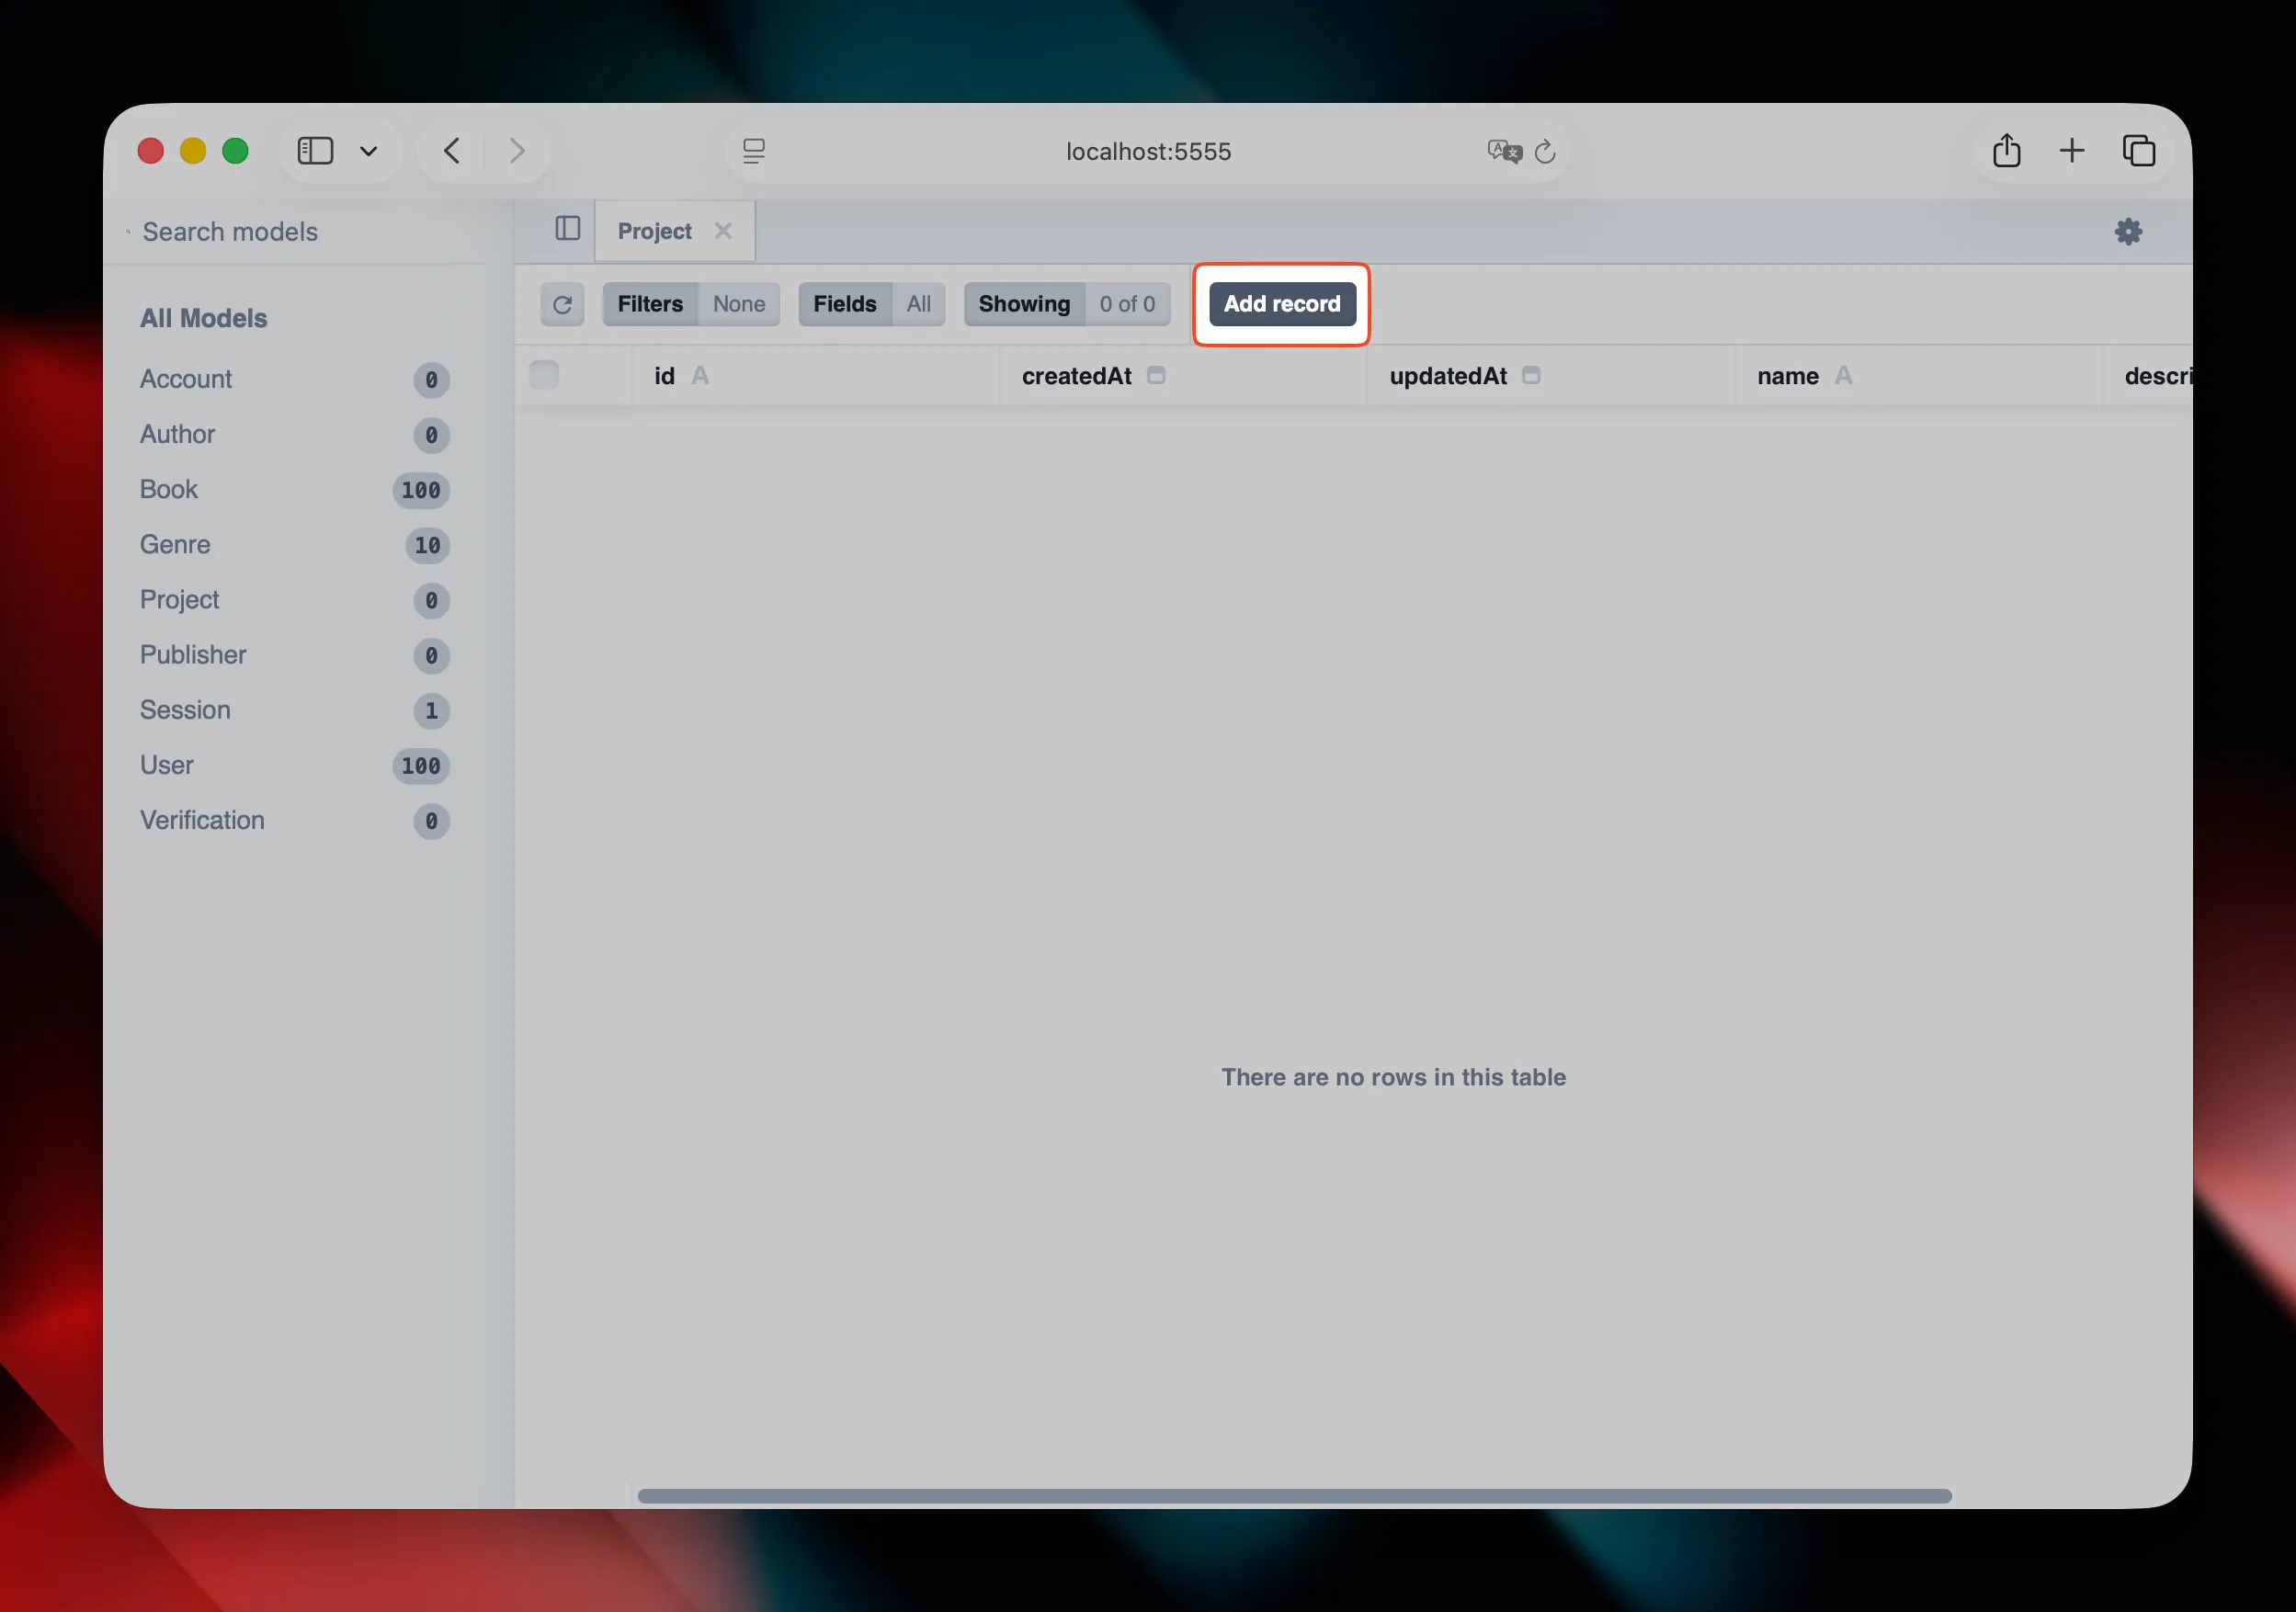
You should see your Project
model and be able to create a new project like the following.
Create database seeds
For easy development and better Developer eXperience (DX), we will create a new seed for our new Project
model.
This will allow every new developer to start with some projects instead of an empty database.
Create an new file project.ts
in the prisma/seed/models
folder with a createProjects
function.
export async function createProjects() {
// ...
}
Add a console.log for better DX.
export async function createProjects() {
console.log(`⏳ Seeding projects`);
// ...
}
Check if the project exist to make the seed idempotent.
import { prisma } from "prisma/seed/utils";
export async function createProjects() {
console.log(`⏳ Seeding projects`);
if (!(await prisma.project.findUnique({ where: { name: "My Project" } }))) {
// ...
}
}
Create the project with prisma.
import { prisma } from "prisma/seed/utils";
export async function createProjects() {
console.log(`⏳ Seeding projects`);
if (!(await prisma.project.findUnique({ where: { name: "My Project" } }))) {
await prisma.project.create({
data: {
name: "My Project",
description: "This is a project created with the seed command",
},
});
}
}
Now, import the function into the prisma/seed/index.ts
file.
import { createRepositories } from "prisma/seed/models/repository";
import { createUsers } from "prisma/seed/models/user";
import { createProjects } from "prisma/seed/models/project";
import { prisma } from "prisma/seed/utils";
async function main() {
await createRepositories();
await createUsers();
await createProjects();
}
main()
.catch((e) => {
console.error(e);
process.exit(1);
})
.finally(() => {
prisma.$disconnect();
});
Finally, run the seed command.
pnpm db:seed
You can check that the project is created by running the pnpm db:ui
command again.
Step 2: Create the backend router
Create the tRPC router
Create a projects.ts
file in the src/server/routers
folder and create an empty tRPC router with the following code.
import { createTRPCRouter } from "@/server/config/trpc";
export const projectsRouter = createTRPCRouter({
//...
});
Add the first query to list the projects
We will create a query to get all the projects from the database.
In the projects router file (src/server/routers/projects.ts
), create a getAll
key for our query.
import { createTRPCRouter } from '@/server/config/trpc';
export const projectsRouter = createTRPCRouter({
getAll: //...
});
We need this query to be protected and accessible only by admin users. So we will use the protectedProcedure
.
import { createTRPCRouter, protectedProcedure } from "@/server/config/trpc";
export const projectsRouter = createTRPCRouter({
getAll: protectedProcedure({ authorizations: ["ADMIN"] }), //...
});
Then we need to create the input
and the output
of our query. For now, the input will be void and the output will only return an array of projects with id
, name
and description
properties.
import { z } from "zod";
import { createTRPCRouter, protectedProcedure } from "@/server/config/trpc";
export const projectsRouter = createTRPCRouter({
getAll: protectedProcedure({ authorizations: ["ADMIN"] })
.input(z.void())
.output(
z.array(
z.object({
id: z.string().cuid(),
name: z.string(),
description: z.string().nullish(),
})
)
), //...
});
We will add some meta
to auto generate the REST api based on the tRPC api.
This step is optional, if you don't plan to support and maintain the REST api, you can skip this step.
import { z } from "zod";
import { createTRPCRouter, protectedProcedure } from "@/server/config/trpc";
export const projectsRouter = createTRPCRouter({
getAll: protectedProcedure({ authorizations: ["ADMIN"] })
.meta({
openapi: {
method: "GET",
path: "/projects",
protect: true,
tags: ["projects"],
},
})
.input(z.void())
.output(
z.array(
z.object({
id: z.string().cuid(),
name: z.string(),
description: z.string().nullish(),
})
)
), //...
});
And now, let's create the query with the projects.
import { z } from "zod";
import { createTRPCRouter, protectedProcedure } from "@/server/config/trpc";
export const projectsRouter = createTRPCRouter({
getAll: protectedProcedure({ authorizations: ["ADMIN"] })
.meta({
openapi: {
method: "GET",
path: "/projects",
protect: true,
tags: ["projects"],
},
})
.input(z.void())
.output(
z.array(
z.object({
id: z.string().cuid(),
name: z.string(),
description: z.string().nullish(),
})
)
)
.query(async ({ ctx }) => {
const projects = await ctx.db.project.findMany();
return projects;
}),
});
Add load more capability
We will allow the query to be paginated with a load more strategy.
First, let's update our input to accept a limit
and a cursor
params.
import { z } from "zod";
import { createTRPCRouter, protectedProcedure } from "@/server/config/trpc";
export const projectsRouter = createTRPCRouter({
getAll: protectedProcedure({ authorizations: ["ADMIN"] })
.meta({
openapi: {
method: "GET",
path: "/projects",
protect: true,
tags: ["projects"],
},
})
.input(
z
.object({
cursor: z.string().cuid().optional(),
limit: z.number().min(1).max(100).default(20),
})
.default({})
)
.output(
z.array(
z.object({
id: z.string().cuid(),
name: z.string(),
description: z.string().nullish(),
})
)
)
.query(async ({ ctx }) => {
const projects = await ctx.db.project.findMany();
return projects;
}),
});
Then we will need to update our prisma query.
import { z } from "zod";
import { createTRPCRouter, protectedProcedure } from "@/server/config/trpc";
export const projectsRouter = createTRPCRouter({
getAll: protectedProcedure({ authorizations: ["ADMIN"] })
.meta({
openapi: {
method: "GET",
path: "/projects",
protect: true,
tags: ["projects"],
},
})
.input(
z
.object({
cursor: z.string().cuid().optional(),
limit: z.number().min(1).max(100).default(20),
})
.default({})
)
.output(
z.array(
z.object({
id: z.string().cuid(),
name: z.string(),
description: z.string().nullish(),
})
)
)
.query(async ({ ctx, input }) => {
const projects = await ctx.db.project.findMany({
// Get an extra item at the end which we'll use as next cursor
take: input.limit + 1,
cursor: input.cursor ? { id: input.cursor } : undefined,
});
return projects;
}),
});
Now, we need to update our output to send not only the projects but also the nextCursor
.
import { z } from "zod";
import { createTRPCRouter, protectedProcedure } from "@/server/config/trpc";
export const projectsRouter = createTRPCRouter({
getAll: protectedProcedure({ authorizations: ["ADMIN"] })
.meta({
openapi: {
method: "GET",
path: "/projects",
protect: true,
tags: ["projects"],
},
})
.input(
z
.object({
cursor: z.string().cuid().optional(),
limit: z.number().min(1).max(100).default(20),
})
.default({})
)
.output(
z.object({
items: z.array(
z.object({
id: z.string().cuid(),
name: z.string(),
description: z.string().nullish(),
})
),
nextCursor: z.string().cuid().nullish(),
})
)
.query(async ({ ctx, input }) => {
const projects = await ctx.db.project.findMany({
// Get an extra item at the end which we'll use as next cursor
take: input.limit + 1,
cursor: input.cursor ? { id: input.cursor } : undefined,
});
let nextCursor: typeof input.cursor | undefined = undefined;
if (projects.length > input.limit) {
const nextProject = projects.pop();
nextCursor = nextProject?.id;
}
return { items: projects, nextCursor };
}),
});
We will now add the total of projects in the output data to let the UI know how many projects are available even if now the UI will not request all projects at once.
import { z } from "zod";
import { createTRPCRouter, protectedProcedure } from "@/server/config/trpc";
export const projectsRouter = createTRPCRouter({
getAll: protectedProcedure({ authorizations: ["ADMIN"] })
.meta({
openapi: {
method: "GET",
path: "/projects",
protect: true,
tags: ["projects"],
},
})
.input(
z
.object({
cursor: z.string().cuid().optional(),
limit: z.number().min(1).max(100).default(20),
})
.default({})
)
.output(
z.object({
items: z.array(
z.object({
id: z.string().cuid(),
name: z.string(),
description: z.string().nullish(),
})
),
nextCursor: z.string().cuid().nullish(),
total: z.number(),
})
)
.query(async ({ ctx, input }) => {
const [total, projects] = await ctx.db.$transaction([
ctx.db.project.count(),
ctx.db.project.findMany({
// Get an extra item at the end which we'll use as next cursor
take: input.limit + 1,
cursor: input.cursor ? { id: input.cursor } : undefined,
}),
]);
let nextCursor: typeof input.cursor | undefined = undefined;
if (projects.length > input.limit) {
const nextProject = projects.pop();
nextCursor = nextProject?.id;
}
return { items: projects, nextCursor, total };
}),
});
Add search capability
Let's add the possibility to search a project by name. We are adding a searchTerm
in the input and add a where
clause.
We need to put this where
on both prisma requests, so we can create a constant with the help of the Prisma.ProjectWhereInput
generated types.
import { Prisma } from "@prisma/client";
import { z } from "zod";
import { createTRPCRouter, protectedProcedure } from "@/server/config/trpc";
export const projectsRouter = createTRPCRouter({
getAll: protectedProcedure({ authorizations: ["ADMIN"] })
.meta({
openapi: {
method: "GET",
path: "/projects",
protect: true,
tags: ["projects"],
},
})
.input(
z
.object({
cursor: z.string().cuid().optional(),
limit: z.number().min(1).max(100).default(20),
searchTerm: z.string().optional(),
})
.default({})
)
.output(
z.object({
items: z.array(
z.object({
id: z.string().cuid(),
name: z.string(),
description: z.string().nullish(),
})
),
nextCursor: z.string().cuid().nullish(),
total: z.number(),
})
)
.query(async ({ ctx, input }) => {
const where = {
name: {
contains: input.searchTerm,
mode: "insensitive",
},
} satisfies Prisma.ProjectWhereInput;
const [total, projects] = await ctx.db.$transaction([
ctx.db.project.count({ where }),
ctx.db.project.findMany({
// Get an extra item at the end which we'll use as next cursor
take: input.limit + 1,
cursor: input.cursor ? { id: input.cursor } : undefined,
where,
}),
]);
let nextCursor: typeof input.cursor | undefined = undefined;
if (projects.length > input.limit) {
const nextProject = projects.pop();
nextCursor = nextProject?.id;
}
return { items: projects, nextCursor, total };
}),
});
Add the router to the Router.ts file
Finally, import this router in the src/server/router.ts
file.
// ...
import { accountRouter } from "@/server/routers/account";
import { authRouter } from "@/server/routers/auth";
import { projectsRouter } from "@/server/routers/projects";
import { repositoriesRouter } from "@/server/routers/repositories";
import { usersRouter } from "@/server/routers/users";
// ...
export const appRouter = createTRPCRouter({
account: accountRouter,
auth: authRouter,
projects: projectsRouter,
repositories: repositoriesRouter,
users: usersRouter,
});
// ...
Step 3: Create the feature folder
Create the feature folder
To put the UI and shared code, let's create a projects
folder in the src/features
folder.
It's in this folder that we will put all the UI of the projects feature and also the shared code between server and UI.
Extract project zod schema
First, we will extract the zod schema for the project from the tRPC router and put it into a schemas.ts
file in the src/features/projects
folder.
Let's create the src/features/projects/schemas.ts
file with the zod schema for one project.
import { z } from "zod";
import { zu } from "@/lib/zod/zod-utils";
export const zProject = () =>
z.object({
id: z.string().cuid(),
name: zu.string.nonEmpty(z.string()),
description: z.string().nullish(),
});
Let's create the type from this schema.
import { z } from "zod";
import { zu } from "@/lib/zod/zod-utils";
export type Project = z.infer<ReturnType<typeof zProject>>;
export const zProject = () =>
z.object({
id: z.string().cuid(),
name: zu.string.nonEmpty(z.string()),
description: z.string().nullish(),
});
Use this schema in the tRPC router in the src/server/routers/projects.ts
file.
import { Prisma } from "@prisma/client";
import { z } from "zod";
import { zProject } from "@/features/projects/schemas";
import { createTRPCRouter, protectedProcedure } from "@/server/config/trpc";
export const projectsRouter = createTRPCRouter({
getAll: protectedProcedure({ authorizations: ["ADMIN"] })
.meta(/* ... */)
.input(/* ... */)
.output(
z.object({
items: z.array(zProject()),
nextCursor: z.string().cuid().nullish(),
total: z.number(),
})
)
.query(/* ... */),
});
Create the routes.ts file
To prevent raw string urls all over our files, we are creating a routes.ts
file in the src/features/projects
folder.
This file will have all the available urls of our projects
feature.
import { ROUTES_ADMIN } from "@/features/admin/routes";
export const ROUTES_PROJECTS = {
admin: {
root: () => `${ROUTES_ADMIN.baseUrl()}/projects`,
create: () => `${ROUTES_PROJECTS.admin.root()}/create`,
project: (params: { id: string }) =>
`${ROUTES_PROJECTS.admin.root()}/${params.id}`,
update: (params: { id: string }) =>
`${ROUTES_PROJECTS.admin.root()}/${params.id}/update`,
},
};
Step 4: List all the projects in the UI
Create the page
Create the file PageAdminProjects.tsx
in the src/features/projects
folder with the following content.
import { Heading } from "@chakra-ui/react";
import {
AdminLayoutPage,
AdminLayoutPageContent,
} from "@/features/admin/AdminLayoutPage";
export default function PageAdminProjects() {
return (
<AdminLayoutPage>
<AdminLayoutPageContent>
<Heading flex="none" size="md">
Projects
</Heading>
...
</AdminLayoutPageContent>
</AdminLayoutPage>
);
}
Create the NextJS route
To expose the page component, we need to create the route in the NextJS app router (opens in a new tab).
Create a page.tsx
file in your new projects
folder in src/app/admin/(authenticated)
folder.
- page.tsx
"use client";
import { Suspense } from "react";
import PageAdminProjects from "@/features/projects/PageAdminProjects";
export default function Page() {
return (
<Suspense>
<PageAdminProjects />
</Suspense>
);
}
You can run the pnpm dev
and visit the localhost:3000/admin/projects (opens in a new tab) url to see the result. (You might need to login first).
Display the data
First, let's get the data with tRPC and the @tanstack/react-query
integration in the PageAdminProjects.tsx
file.
import { Heading } from "@chakra-ui/react";
import {
AdminLayoutPage,
AdminLayoutPageContent,
} from "@/features/admin/AdminLayoutPage";
import { trpc } from '@/lib/trpc/client';
export default function PageAdminProjects() {
const projects = trpc.projects.getAll.useQuery();
return (
/* ... */
);
}
Then, use the DataList component to display the data.
import { Heading, Stack } from "@chakra-ui/react";
import {
DataList,
DataListCell,
DataListRow,
DataListText,
} from "@/components/DataList";
import {
AdminLayoutPage,
AdminLayoutPageContent,
} from "@/features/admin/AdminLayoutPage";
import { trpc } from "@/lib/trpc/client";
export default function PageAdminProjects() {
const projects = trpc.projects.getAll.useQuery();
return (
<AdminLayoutPage>
<AdminLayoutPageContent>
<Stack spacing={4}>
<Heading flex="none" size="md">
Projects
</Heading>
<DataList>
{projects.data?.items.map((project) => (
<DataListRow key={project.id}>
<DataListCell>
<DataListText fontWeight="bold">{project.name}</DataListText>
</DataListCell>
<DataListCell>
<DataListText color="text-dimmed">
{project.description}
</DataListText>
</DataListCell>
</DataListRow>
))}
</DataList>
</Stack>
</AdminLayoutPageContent>
</AdminLayoutPage>
);
}
You should have this result on localhost:3000/admin/projects (opens in a new tab) 👇
Handle loading, empty and error state
import { Heading, Stack } from "@chakra-ui/react";
import {
DataList,
DataListCell,
DataListEmptyState,
DataListErrorState,
DataListLoadingState,
DataListRow,
DataListText,
} from "@/components/DataList";
import {
AdminLayoutPage,
AdminLayoutPageContent,
} from "@/features/admin/AdminLayoutPage";
import { trpc } from "@/lib/trpc/client";
export default function PageAdminProjects() {
const projects = trpc.projects.getAll.useQuery();
return (
<AdminLayoutPage>
<AdminLayoutPageContent>
<Stack spacing={4}>
<Heading flex="none" size="md">
Projects
</Heading>
<DataList>
{projects.isLoading && <DataListLoadingState />}
{projects.isError && (
<DataListErrorState retry={() => projects.refetch()} />
)}
{projects.isSuccess && !projects.data.items.length && (
<DataListEmptyState />
)}
{projects.data?.items.map((project) => (
<DataListRow key={project.id}>
<DataListCell>
<DataListText fontWeight="bold">{project.name}</DataListText>
</DataListCell>
<DataListCell>
<DataListText color="text-dimmed">
{project.description}
</DataListText>
</DataListCell>
</DataListRow>
))}
</DataList>
</Stack>
</AdminLayoutPageContent>
</AdminLayoutPage>
);
}
Add load more
First, we need to use useInfiniteQuery
instead of useQuery
and implement the getNextPageParam logic.
/* ... */
export default function PageAdminProjects() {
const projects = trpc.projects.getAll.useInfiniteQuery(
{},
{
getNextPageParam: (lastPage) => lastPage.nextCursor,
}
);
return (
/* ... */
);
}
Now, we need to update how we display the data.
/* ... */
export default function PageAdminProjects() {
/* ... */
return (
<AdminLayoutPage>
<AdminLayoutPageContent>
<Stack spacing={4}>
<Heading flex="none" size="md">
Projects
</Heading>
<DataList>
{projects.isLoading && <DataListLoadingState />}
{projects.isError && (
<DataListErrorState retry={() => projects.refetch()} />
)}
{projects.isSuccess &&
!projects.data.pages.flatMap((p) => p.items).length && (
<DataListEmptyState />
)}
{projects.data?.pages
.flatMap((p) => p.items)
.map((project) => (
<DataListRow key={project.id}>
<DataListCell>
<DataListText fontWeight="bold">
{project.name}
</DataListText>
</DataListCell>
<DataListCell>
<DataListText color="text-dimmed">
{project.description}
</DataListText>
</DataListCell>
</DataListRow>
))}
</DataList>
</Stack>
</AdminLayoutPageContent>
</AdminLayoutPage>
);
}
And now, let's add the load more button.
import { Button, Heading, Stack } from "@chakra-ui/react";
/* ... */
export default function PageAdminProjects() {
/* ... */
return (
<AdminLayoutPage>
<AdminLayoutPageContent>
<Stack spacing={4}>
<Heading flex="none" size="md">
Projects
</Heading>
<DataList>
{projects.isLoading && <DataListLoadingState />}
{projects.isError && (
<DataListErrorState retry={() => projects.refetch()} />
)}
{projects.isSuccess &&
!projects.data.pages.flatMap((p) => p.items).length && (
<DataListEmptyState />
)}
{projects.data?.pages
.flatMap((p) => p.items)
.map((project) => (
<DataListRow key={project.id}>
<DataListCell>
<DataListText fontWeight="bold">
{project.name}
</DataListText>
</DataListCell>
<DataListCell>
<DataListText color="text-dimmed">
{project.description}
</DataListText>
</DataListCell>
</DataListRow>
))}
{projects.isSuccess && (
<DataListRow mt="auto">
<DataListCell>
<Button
size="sm"
onClick={() => projects.fetchNextPage()}
isLoading={projects.isFetchingNextPage}
isDisabled={!projects.hasNextPage}
>
Load more
</Button>
</DataListCell>
</DataListRow>
)}
</DataList>
</Stack>
</AdminLayoutPageContent>
</AdminLayoutPage>
);
}
Want to test with only 2 projects? Add limit: 1
to the useInfiniteQuery
and you should be able to see the first project and click on "Load more" to display the second project.
const projects = trpc.projects.getAll.useInfiniteQuery(
{ limit: 1 },
{
getNextPageParam: (lastPage) => lastPage.nextCursor,
}
);
Revert this last change to continue.
Add search
First, let's add the SearchInput
component in the UI.
import { SearchInput } from "@/components/SearchInput";
/* ... */
export default function PageAdminProjects() {
/* ... */
return (
<AdminLayoutPage>
<AdminLayoutPageContent>
<Stack spacing={4}>
<Flex
flexDirection={{ base: "column", md: "row" }}
alignItems={{ base: "start", md: "center" }}
gap={4}
>
<Heading flex="none" size="md">
Projects
</Heading>
<SearchInput size="sm" maxW={{ base: "none", md: "20rem" }} />
</Flex>
<DataList>{/* ... */}</DataList>
</Stack>
</AdminLayoutPageContent>
</AdminLayoutPage>
);
}
Then connect the SearchInput
value to the useInfiniteQuery
via a search param (s
) in the url.
import { useQueryState } from "nuqs";
/* ... */
export default function PageAdminProjects() {
const [searchTerm, setSearchTerm] = useQueryState("s", { defaultValue: "" });
const projects = trpc.projects.getAll.useInfiniteQuery(
{
searchTerm,
},
{
getNextPageParam: (lastPage) => lastPage.nextCursor,
}
);
return (
<AdminLayoutPage>
<AdminLayoutPageContent>
<Stack spacing={4}>
<Flex
flexDirection={{ base: "column", md: "row" }}
alignItems={{ base: "start", md: "center" }}
gap={4}
>
<Heading flex="none" size="md">
Projects
</Heading>
<SearchInput
value={searchTerm}
onChange={(value) => setSearchTerm(value || null)}
size="sm"
maxW={{ base: "none", md: "20rem" }}
/>
</Flex>
<DataList>{/* ... */}</DataList>
</Stack>
</AdminLayoutPageContent>
</AdminLayoutPage>
);
}
Let's just add the search term to the existing <DataListEmptyState />
for a better UX.
/* ... */
<DataListEmptyState searchTerm={searchTerm} />
/* ... */
Result
You can view the projects at localhost:3000/admin/projects (opens in a new tab), the page should looks like this.
And the final code of PageAdminProjects.tsx
file should look like this.
import { Button, Flex, Heading, Stack } from "@chakra-ui/react";
import { useQueryState } from "nuqs";
import {
DataList,
DataListCell,
DataListEmptyState,
DataListErrorState,
DataListLoadingState,
DataListRow,
DataListText,
} from "@/components/DataList";
import { SearchInput } from "@/components/SearchInput";
import {
AdminLayoutPage,
AdminLayoutPageContent,
} from "@/features/admin/AdminLayoutPage";
import { trpc } from "@/lib/trpc/client";
export default function PageAdminProjects() {
const [searchTerm, setSearchTerm] = useQueryState("s", { defaultValue: "" });
const projects = trpc.projects.getAll.useInfiniteQuery(
{
searchTerm,
},
{
getNextPageParam: (lastPage) => lastPage.nextCursor,
}
);
return (
<AdminLayoutPage>
<AdminLayoutPageContent>
<Stack spacing={4}>
<Flex
flexDirection={{ base: "column", md: "row" }}
alignItems={{ base: "start", md: "center" }}
gap={4}
>
<Heading flex="none" size="md">
Projects
</Heading>
<SearchInput
value={searchTerm}
onChange={(value) => setSearchTerm(value || null)}
size="sm"
maxW={{ base: "none", md: "20rem" }}
/>
</Flex>
<DataList>
{projects.isLoading && <DataListLoadingState />}
{projects.isError && (
<DataListErrorState retry={() => projects.refetch()} />
)}
{projects.isSuccess &&
!projects.data.pages.flatMap((p) => p.items).length && (
<DataListEmptyState searchTerm={searchTerm} />
)}
{projects.data?.pages
.flatMap((p) => p.items)
.map((project) => (
<DataListRow key={project.id}>
<DataListCell>
<DataListText fontWeight="bold">
{project.name}
</DataListText>
</DataListCell>
<DataListCell>
<DataListText color="text-dimmed">
{project.description}
</DataListText>
</DataListCell>
</DataListRow>
))}
{projects.isSuccess && (
<DataListRow mt="auto">
<DataListCell>
<Button
size="sm"
onClick={() => projects.fetchNextPage()}
isLoading={projects.isFetchingNextPage}
isDisabled={!projects.hasNextPage}
>
Load more
</Button>
</DataListCell>
</DataListRow>
)}
</DataList>
</Stack>
</AdminLayoutPageContent>
</AdminLayoutPage>
);
}
Step 5: Allows to create a project
Create the tRPC mutation
In the tRPC router we will add the mutation, add the create
key in the src/server/routers/projects.ts
file with meta
, input
and output
like we did with the getAll
query.
/* ... */
export const projectsRouter = createTRPCRouter({
getAll: /* ... */,
create: protectedProcedure({ authorizations: ['ADMIN'] })
.meta({
openapi: {
method: 'POST',
path: '/projects',
protect: true,
tags: ['projects'],
},
})
.input(
zProject().pick({
name: true,
description: true,
})
)
.output(zProject())
});
Then, let's add the logic for the mutation.
import { ExtendedTRPCError } from '@/server/config/errors';
/* ... */
export const projectsRouter = createTRPCRouter({
getAll: /* ... */,
create: protectedProcedure({ authorizations: ['ADMIN'] })
.meta({
openapi: {
method: 'POST',
path: '/projects',
protect: true,
tags: ['projects'],
},
})
.input(
zProject().pick({
name: true,
description: true,
})
)
.output(zProject())
.mutation(async ({ ctx, input }) => {
try {
ctx.logger.info('Creating project');
return await ctx.db.project.create({
data: input,
});
} catch (e) {
throw new ExtendedTRPCError({
cause: e,
});
}
}),
});
Create the page
Create the file PageAdminProjectCreate.tsx
in the src/features/projects
folder with the following content.
import { Button, Heading } from "@chakra-ui/react";
import { AdminBackButton } from "@/features/admin/AdminBackButton";
import { AdminCancelButton } from "@/features/admin/AdminCancelButton";
import {
AdminLayoutPage,
AdminLayoutPageContent,
AdminLayoutPageTopBar,
} from "@/features/admin/AdminLayoutPage";
export default function PageAdminProjectCreate() {
return (
<AdminLayoutPage containerMaxWidth="container.md" showNavBar={false}>
<AdminLayoutPageTopBar
leftActions={<AdminBackButton />}
rightActions={
<>
<AdminCancelButton />
<Button type="submit" variant="@primary">
Create
</Button>
</>
}
>
<Heading size="sm">New Project</Heading>
</AdminLayoutPageTopBar>
<AdminLayoutPageContent>...</AdminLayoutPageContent>
</AdminLayoutPage>
);
}
Create the NextJS route
To expose the page component, we need to create the route in the NextJS app router.
Create a page.tsx
file in a new create
folder in src/app/admin/(authenticated)/projects
folder.
- page.tsx
"use client";
import { Suspense } from "react";
import PageAdminProjectCreate from "@/features/projects/PageAdminProjectCreate";
export default function Page() {
return (
<Suspense>
<PageAdminProjectCreate />
</Suspense>
);
}
Add the create button
Now, in the PageAdminProjects.tsx
file, let's add the create button.
import { Button, Flex, HStack, Heading, Stack } from "@chakra-ui/react";
import Link from "next/link";
import { LuPlus } from "react-icons/lu";
import { ResponsiveIconButton } from "@/components/ResponsiveIconButton";
import { ROUTES_PROJECTS } from "@/features/projects/routes";
/* ... */
export default function PageAdminProjects() {
/* ... */
return (
<AdminLayoutPage>
<AdminLayoutPageContent>
<Stack spacing={4}>
<HStack spacing={4} alignItems={{ base: "end", md: "center" }}>
<Flex
flexDirection={{ base: "column", md: "row" }}
alignItems={{ base: "start", md: "center" }}
gap={4}
flex={1}
>
<Heading flex="none" size="md">
Projects
</Heading>
<SearchInput
value={searchTerm}
onChange={(value) => searchParamsUpdater({ s: value || null })}
size="sm"
maxW={{ base: "none", md: "20rem" }}
/>
</Flex>
<ResponsiveIconButton
as={Link}
href={ROUTES_PROJECTS.admin.create()}
variant="@primary"
size="sm"
icon={<LuPlus />}
>
Create Project
</ResponsiveIconButton>
</HStack>
<DataList>{/* ... */}</DataList>
</Stack>
</AdminLayoutPageContent>
</AdminLayoutPage>
);
}
Create the form validation schema
Let's create the zFormFieldsProject
schema in the src/features/projects/schemas.ts
file like the following.
import { z } from "zod";
import { zu } from "@/lib/zod/zod-utils";
export type Project = z.infer<ReturnType<typeof zProject>>;
export const zProject = () =>
z.object({
id: z.string().cuid(),
name: zu.string.nonEmpty(z.string()),
description: z.string().nullish(),
});
export type FormFieldsProject = z.infer<ReturnType<typeof zFormFieldsProject>>;
export const zFormFieldsProject = () =>
zProject().pick({ name: true, description: true });
Create the form component
Let's create the form fields by creating a ProjectForm
component.
Create the ProjectForm.tsx
in the src/features/projects
folder and with the fields like the following.
import { Stack } from "@chakra-ui/react";
import { useFormContext } from "react-hook-form";
import { FormField } from "@/components/Form";
import { FormFieldsProject } from "@/features/projects/schemas";
export const ProjectForm = () => {
const form = useFormContext<FormFieldsProject>();
return (
<Stack spacing={4}>
<FormField>
<FormFieldLabel>Name</FormFieldLabel>
<FormFieldController control={form.control} type="text" name="name" />
</FormField>
<FormField>
<FormFieldLabel optionalityHint="optional">Description</FormFieldLabel>
<FormField
control={form.control}
type="textarea"
name="description"
rows={6}
/>
</FormField>
</Stack>
);
};
Use the form
Now, let's setup React Hook Form and use the ProjectForm
component in the PageAdminProjectCreate.tsx
file.
import { Button, Heading } from "@chakra-ui/react";
import { zodResolver } from "@hookform/resolvers/zod";
import { useForm } from "react-hook-form";
import { Form } from "@/components/Form";
import { AdminBackButton } from "@/features/admin/AdminBackButton";
import { AdminCancelButton } from "@/features/admin/AdminCancelButton";
import {
AdminLayoutPage,
AdminLayoutPageContent,
AdminLayoutPageTopBar,
} from "@/features/admin/AdminLayoutPage";
import { ProjectForm } from "@/features/projects/ProjectForm";
import {
FormFieldsProject,
zFormFieldsProject,
} from "@/features/projects/schemas";
export default function PageAdminProjectCreate() {
const form = useForm<FormFieldsProject>({
resolver: zodResolver(zFormFieldsProject()),
defaultValues: {
name: "",
description: "",
},
});
return (
<Form {...form}>
<AdminLayoutPage containerMaxWidth="container.md" showNavBar={false}>
<AdminLayoutPageTopBar
leftActions={<AdminBackButton />}
rightActions={
<>
<AdminCancelButton />
<Button type="submit" variant="@primary">
Create
</Button>
</>
}
>
<Heading size="sm">New Project</Heading>
</AdminLayoutPageTopBar>
<AdminLayoutPageContent>
<ProjectForm />
</AdminLayoutPageContent>
</AdminLayoutPage>
</Form>
);
}
Submit the form
When the form is submitted and valid, we can submit the mutation to the server.
import { trpc } from "@/lib/trpc/client";
/* ... */
export default function PageAdminProjectCreate() {
const createProject = trpc.projects.create.useMutation();
const form = useForm<FormFieldsProject>({
resolver: zodResolver(zFormFieldsProject()),
defaultValues: {
name: "",
description: "",
},
});
return (
<Form
{...form}
onSubmit={(values) => {
createProject.mutate(values);
}}
>
{/* ... */}
</Form>
);
}
And now, we need to invalidate the project list query and redirect the user when the mutation has succeeded.
useRouter
is imported from next/navigation
and not next/router
import { useRouter } from 'next/navigation';
/* ... */
export default function PageAdminProjectCreate() {
const trpcUtils = trpc.useUtils();
const router = useRouter();
const createProject = trpc.projects.create.useMutation({
onSuccess: async () => {
await trpcUtils.projects.getAll.invalidate();
router.back();
},
});
const form = /* ... */
return (
/* ... */
);
}
Enhance UX
Let's improve the UX of the form.
import { toastCustom } from "@/components/Toast";
import { isErrorDatabaseConflict } from "@/lib/trpc/errors";
/* ... */
export default function PageAdminProjectCreate() {
const trpcUtils = trpc.useUtils();
const router = useRouter();
const createProject = trpc.projects.create.useMutation({
onSuccess: async () => {
await trpcUtils.projects.getAll.invalidate();
toastCustom({
status: 'success',
title: "Project created with success",
});
router.back();
},
onError: (error) => {
if (isErrorDatabaseConflict(error, "name")) {
form.setError("name", { message: "Name already used" });
return;
}
toastCustom({
status: 'error',
title: "Failed to create the project",
});
},
});
const form = /* ... */;
return (
<Form
{...form}
onSubmit={(values) => {
createProject.mutate(values);
}}
>
<AdminLayoutPage containerMaxWidth="container.md" showNavBar={false}>
<AdminLayoutPageTopBar
leftActions={<AdminBackButton withConfirm={form.formState.isDirty} />}
rightActions={
<>
<AdminCancelButton withConfirm={form.formState.isDirty} />
<Button
type="submit"
variant="@primary"
isLoading={createProject.isLoading || createProject.isSuccess}
>
Create
</Button>
</>
}
>
<Heading size="sm">New Project</Heading>
</AdminLayoutPageTopBar>
<AdminLayoutPageContent>
<ProjectForm />
</AdminLayoutPageContent>
</AdminLayoutPage>
</Form>
);
}
Result
You can test the form at localhost:3000/admin/projects (opens in a new tab) by using the create button we previously added, the page should look like this.
And the final code of PageAdminProjectCreate.tsx
file should look like this.
import { Button, Heading } from "@chakra-ui/react";
import { zodResolver } from "@hookform/resolvers/zod";
import { useRouter } from "next/navigation";
import { useForm } from "react-hook-form";
import { toastCustom } from "@/components/Toast";
import { AdminBackButton } from "@/features/admin/AdminBackButton";
import { AdminCancelButton } from "@/features/admin/AdminCancelButton";
import {
AdminLayoutPage,
AdminLayoutPageContent,
AdminLayoutPageTopBar,
} from "@/features/admin/AdminLayoutPage";
import {
ProjectForm,
ProjectFormFields,
} from "@/features/projects/ProjectForm";
import { trpc } from "@/lib/trpc/client";
import { isErrorDatabaseConflict } from "@/lib/trpc/errors";
export default function PageAdminProjectCreate() {
const trpcUtils = trpc.useUtils();
const router = useRouter();
const createProject = trpc.projects.create.useMutation({
onSuccess: async () => {
await trpcUtils.projects.getAll.invalidate();
toastCustom({
status: "success",
title: "Project created with success",
});
router.back();
},
onError: (error) => {
if (isErrorDatabaseConflict(error, "name")) {
form.setError("name", { message: "Name already used" });
return;
}
toastCustom({
status: "error",
title: "Failed to create the project",
});
},
});
const form = useForm<FormFieldsProject>({
resolver: zodResolver(zFormFieldsProject()),
defaultValues: {
name: "",
description: "",
},
});
return (
<Form
{...form}
onSubmit={(values) => {
createProject.mutate(values);
}}
>
<AdminLayoutPage containerMaxWidth="container.md" showNavBar={false}>
<AdminLayoutPageTopBar
leftActions={<AdminBackButton withConfirm={form.formState.isDirty} />}
rightActions={
<>
<AdminCancelButton withConfirm={form.formState.isDirty} />
<Button
type="submit"
variant="@primary"
isLoading={createProject.isLoading || createProject.isSuccess}
>
Create
</Button>
</>
}
>
<Heading size="sm">New Project</Heading>
</AdminLayoutPageTopBar>
<AdminLayoutPageContent>
<ProjectForm />
</AdminLayoutPageContent>
</AdminLayoutPage>
</Form>
);
}
Step 6: Allows to view a project
Create the tRPC query
In the tRPC router we can add the getById
query in the src/server/routers/projects.ts
file.
import { TRPCError } from '@trpc/server';
/* ... */
export const projectsRouter = createTRPCRouter({
getAll: /* ... */,
create: /* ... */,
getById: protectedProcedure({ authorizations: ['ADMIN'] })
.meta({
openapi: {
method: 'GET',
path: '/projects/{id}',
protect: true,
tags: ['projects'],
},
})
.input(zProject().pick({ id: true }))
.output(zProject())
.query(async ({ ctx, input }) => {
ctx.logger.info('Getting project');
const project = await ctx.db.project.findUnique({
where: { id: input.id },
});
if (!project) {
ctx.logger.warn('Unable to find project with the provided input');
throw new TRPCError({
code: 'NOT_FOUND',
});
}
return project;
}),
});
Create the page
Create the file PageAdminProject.tsx
in the src/features/projects
folder with the following content.
This file is not the same as PageAdminProjects.tsx
which is used to diplay
all projects, PageAdminProject.tsx
will be displaying a project details.
import {
Box,
Card,
CardBody,
Heading,
SkeletonText,
Stack,
Text,
} from "@chakra-ui/react";
import { useParams } from "next/navigation";
import { ErrorPage } from "@/components/ErrorPage";
import { LoaderFull } from "@/components/LoaderFull";
import { AdminBackButton } from "@/features/admin/AdminBackButton";
import {
AdminLayoutPage,
AdminLayoutPageContent,
AdminLayoutPageTopBar,
} from "@/features/admin/AdminLayoutPage";
import { trpc } from "@/lib/trpc/client";
export default function PageAdminProject() {
const params = useParams();
const project = trpc.projects.getById.useQuery({
id: params?.id?.toString() ?? "",
});
return (
<AdminLayoutPage showNavBar="desktop" containerMaxWidth="container.md">
<AdminLayoutPageTopBar leftActions={<AdminBackButton />}>
{project.isLoading && <SkeletonText maxW="6rem" noOfLines={2} />}
{project.isSuccess && <Heading size="sm">{project.data?.name}</Heading>}
</AdminLayoutPageTopBar>
<AdminLayoutPageContent>
{project.isLoading && <LoaderFull />}
{project.isError && <ErrorPage />}
{project.isSuccess && (
<Card>
<CardBody>
<Stack spacing={4}>
<Box>
<Text fontSize="sm" fontWeight="bold">
Name
</Text>
<Text>{project.data.name}</Text>
</Box>
<Box>
<Text fontSize="sm" fontWeight="bold">
Description
</Text>
<Text>{project.data.description || <small>-</small>}</Text>
</Box>
</Stack>
</CardBody>
</Card>
)}
</AdminLayoutPageContent>
</AdminLayoutPage>
);
}
Create the NextJS route
To expose the page component, we need to create the route in the NextJS app router.
Create a page.tsx
file in a new [id]
folder in src/app/admin/(authenticated)/projects
folder.
- page.tsx
"use client";
import { Suspense } from "react";
import PageAdminProject from "@/features/projects/PageAdminProject";
export default function Page() {
return (
<Suspense>
<PageAdminProject />
</Suspense>
);
}
Add the links in the listing
Now, in the PageAdminProjects.tsx
we can add the link to each projects. We can use the LinkOverlay component (opens in a new tab) from Chakra UI.
import {
Button,
Flex,
HStack,
Heading,
LinkBox,
LinkOverlay,
Stack,
} from "@chakra-ui/react";
/* ... */
export default function PageAdminProjects() {
/* ... */
return (
<AdminLayoutPage>
<AdminLayoutPageContent>
<Stack spacing={4}>
<HStack spacing={4} alignItems={{ base: "end", md: "center" }}>
{/* ... */}
</HStack>
<DataList>
{/* ... */}
{projects.data?.pages
.flatMap((p) => p.items)
.map((project) => (
<DataListRow as={LinkBox} key={project.id} withHover>
<DataListCell>
<DataListText fontWeight="bold">
<LinkOverlay
as={Link}
href={ROUTES_PROJECTS.admin.project({ id: project.id })}
>
{project.name}
</LinkOverlay>
</DataListText>
</DataListCell>
{/* ... */}
</DataListRow>
))}
{/* ... */}
</DataList>
</Stack>
</AdminLayoutPageContent>
</AdminLayoutPage>
);
}
Result
The view page of a project should looks like this.
Step 7: Allows to update a project
Create the tRPC mutation
In the tRPC router we can add the updateById
mutation in the src/server/routers/projects.ts
file.
/* ... */
export const projectsRouter = createTRPCRouter({
getAll: /* ... */,
create: /* ... */,
getById: /* ... */,
updateById: protectedProcedure({ authorizations: ['ADMIN'] })
.meta({
openapi: {
method: 'PUT',
path: '/projects/{id}',
protect: true,
tags: ['projects'],
},
})
.input(
zProject().pick({
id: true,
name: true,
description: true,
})
)
.output(zProject())
.mutation(async ({ ctx, input }) => {
try {
ctx.logger.info('Updating project');
return await ctx.db.project.update({
where: { id: input.id },
data: input,
});
} catch (e) {
throw new ExtendedTRPCError({
cause: e,
});
}
}),
});
Create the page
Create the file PageAdminProjectUpdate.tsx
in the src/features/projects
folder with the following content.
import { Button, Heading, SkeletonText, Stack } from "@chakra-ui/react";
import { zodResolver } from "@hookform/resolvers/zod";
import { useParams, useRouter } from "next/navigation";
import { useForm } from "react-hook-form";
import { ErrorPage } from "@/components/ErrorPage";
import { Form } from "@/components/Form";
import { LoaderFull } from "@/components/LoaderFull";
import { toastCustom } from "@/components/Toast";
import { AdminBackButton } from "@/features/admin/AdminBackButton";
import { AdminCancelButton } from "@/features/admin/AdminCancelButton";
import {
AdminLayoutPage,
AdminLayoutPageContent,
AdminLayoutPageTopBar,
} from "@/features/admin/AdminLayoutPage";
import { ProjectForm } from "@/features/projects/ProjectForm";
import {
FormFieldsProject,
zFormFieldsProject,
} from "@/features/projects/schemas";
import { trpc } from "@/lib/trpc/client";
import { isErrorDatabaseConflict } from "@/lib/trpc/errors";
export default function PageAdminProjectUpdate() {
const trpcUtils = trpc.useUtils();
const params = useParams();
const router = useRouter();
const project = trpc.projects.getById.useQuery(
{
id: params?.id?.toString() ?? "",
},
{
staleTime: Infinity,
}
);
const isReady = !project.isFetching;
const updateProject = trpc.projects.updateById.useMutation({
onSuccess: async () => {
await trpcUtils.projects.invalidate();
toastCustom({
status: "success",
title: "Updated with success",
});
router.back();
},
onError: (error) => {
if (isErrorDatabaseConflict(error, "name")) {
form.setError("name", { message: "Name already used" });
return;
}
toastCustom({
status: "error",
title: "Update failed",
});
},
});
const form = useForm<FormFieldsProject>({
resolver: zodResolver(zFormFieldsProject()),
values: {
name: project.data?.name ?? "",
description: project.data?.description,
},
});
return (
<Form
{...form}
onSubmit={(values) => {
if (!project.data?.id) return;
updateProject.mutate({
id: project.data.id,
...values,
});
}}
>
<AdminLayoutPage containerMaxWidth="container.md" showNavBar={false}>
<AdminLayoutPageTopBar
leftActions={<AdminBackButton withConfirm={form.formState.isDirty} />}
rightActions={
<>
<AdminCancelButton withConfirm={form.formState.isDirty} />
<Button
type="submit"
variant="@primary"
isLoading={updateProject.isLoading || updateProject.isSuccess}
>
Save
</Button>
</>
}
>
<Stack flex={1} spacing={0}>
{project.isLoading && <SkeletonText maxW="6rem" noOfLines={2} />}
{project.isSuccess && (
<Heading size="sm">{project.data?.name}</Heading>
)}
</Stack>
</AdminLayoutPageTopBar>
{!isReady && <LoaderFull />}
{isReady && project.isError && <ErrorPage />}
{isReady && project.isSuccess && (
<AdminLayoutPageContent>
<ProjectForm />
</AdminLayoutPageContent>
)}
</AdminLayoutPage>
</Form>
);
}
Create the NextJS route
To expose the page component, we need to create the route in the NextJS app router.
Create a page.tsx
file in a new update
folder in src/app/admin/(authenticated)/projects/[id]
folder.
- page.tsx
"use client";
import { Suspense } from "react";
import PageAdminProjectUpdate from "@/features/projects/PageAdminProjectUpdate";
export default function Page() {
return (
<Suspense>
<PageAdminProjectUpdate />
</Suspense>
);
}
Add the edit button in the view
Now, in the PageAdminProject.tsx
we can add an edit button which links to the update page.
import Link from "next/link";
import { LuPenLine } from "react-icons/lu";
import { ResponsiveIconButton } from "@/components/ResponsiveIconButton";
import { ROUTES_PROJECTS } from "@/features/projects/routes";
/* ... */
export default function PageAdminProject() {
/* ... */
return (
<AdminLayoutPage showNavBar="desktop" containerMaxWidth="container.md">
<AdminLayoutPageTopBar
leftActions={<AdminBackButton />}
rightActions={
<ResponsiveIconButton
as={Link}
href={ROUTES_PROJECTS.admin.update({ id: project.id })}
icon={<LuPenLine />}
>
Edit
</ResponsiveIconButton>
}
>
{/* ... */}
</AdminLayoutPageTopBar>
<AdminLayoutPageContent>{/* ... */}</AdminLayoutPageContent>
</AdminLayoutPage>
);
}
Result
The update page of a project should looks like this.
Step 8: Allows to delete a project
Create the tRPC mutation
In the tRPC router we can add the removeById
mutation in the src/server/routers/projects.ts
file.
/* ... */
export const projectsRouter = createTRPCRouter({
getAll: /* ... */,
create: /* ... */,
getById: /* ... */,
updateById: /* ... */,
removeById: protectedProcedure({ authorizations: ['ADMIN'] })
.meta({
openapi: {
method: 'DELETE',
path: '/projects/{id}',
protect: true,
tags: ['projects'],
},
})
.input(zProject().pick({ id: true }))
.output(zProject())
.mutation(async ({ ctx, input }) => {
ctx.logger.info({ input }, 'Removing project');
try {
return await ctx.db.project.delete({
where: { id: input.id },
});
} catch (e) {
throw new ExtendedTRPCError({
cause: e,
});
}
}),
});
Use the tRPC mutation
Now, let's implement the delete button with a confirm modal in the PageAdminProject.tsx
file.
useRouter
is imported from next/navigation
and not next/router
import {
/* ... */
IconButton,
/* ... */
} from "@chakra-ui/react";
import { /* ... */, useRouter } from "next/navigation";
import { /* ... */, LuTrash2 } from "react-icons/lu";
import { ConfirmModal } from "@/components/ConfirmModal";
import { toastCustom } from "@/components/Toast";
/* ... */
export default function PageAdminProject() {
const router = useRouter();
const trpcUtils = trpc.useUtils();
const params = /* ... */;
const project = /* ... */;
const projectDelete = trpc.projects.removeById.useMutation({
onSuccess: async () => {
await trpcUtils.projects.getAll.invalidate();
router.replace(ROUTES_PROJECTS.admin.root());
},
onError: () => {
toastCustom({
status: "error",
title: "Deletion failed",
description: "Failed to delete the project",
});
},
});
return (
<AdminLayoutPage showNavBar="desktop" containerMaxWidth="container.md">
<AdminLayoutPageTopBar
leftActions={<AdminBackButton />}
rightActions={
<>
<ResponsiveIconButton
as={Link}
href={ROUTES_PROJECTS.admin.update({ id: project.id })}
icon={<LuPenLine />}
>
Edit
</ResponsiveIconButton>
<ConfirmModal
title="Confirm deleting the project"
message={`Would you like to delete "${project.data?.name}"? Delete will be permanent.`}
onConfirm={() =>
project.data &&
projectDelete.mutate({
id: project.data.id,
})
}
confirmText="Delete"
confirmVariant="@dangerSecondary"
>
<IconButton
aria-label="Delete"
icon={<LuTrash2 />}
isDisabled={!project.data}
isLoading={projectDelete.isLoading}
/>
</ConfirmModal>
</>
}
>
{/* ... */}
</AdminLayoutPageTopBar>
<AdminLayoutPageContent>
{/* ... */}
</AdminLayoutPageContent>
</AdminLayoutPage>
);
}
Result
The delete action of a project should look like this.
That's a wrap
Update the main menu
Udpate the AdminNavBarMainMenu
component in the src/features/admin/AdminNavBar.tsx
file.
import { ROUTES_PROJECTS } from "@/features/projects/routes";
/* ... */
const AdminNavBarMainMenu = ({ ...rest }: StackProps) => {
const { t } = useTranslation(["admin"]);
return (
<Stack direction="row" spacing="1" {...rest}>
<AdminNavBarMainMenuItem href={ROUTES_ADMIN_DASHBOARD.admin.root()}>
{t("admin:layout.mainMenu.dashboard")}
</AdminNavBarMainMenuItem>
<AdminNavBarMainMenuItem href={ROUTES_REPOSITORIES.admin.root()}>
{t("admin:layout.mainMenu.repositories")}
</AdminNavBarMainMenuItem>
<AdminNavBarMainMenuItem href={ROUTES_PROJECTS.admin.root()}>
Projects
</AdminNavBarMainMenuItem>
<AdminNavBarMainMenuItem href={ROUTES_MANAGEMENT.admin.root()}>
{t("admin:layout.mainMenu.management")}
</AdminNavBarMainMenuItem>
</Stack>
);
};
/* ... */
Congrats
If you made it until this end, CONGRATS!
Now have fun by adding all the translations 😅